

Summer finds me in the Cordillera Blanca, the great mountain range of Peru.
Nevado Pisco is one of the most popular peaks in this range, owing to its generally easy nature and great summit views. Every tourist agency in Huaraz will offer to take you to the top of Pisco – but do you really need a guide to climb Pisco? Not if you have some experience mountaineering. You may encounter some old information which says guides are obligatory in the Cordillera Blanca, but as of 2023, this rule is not being enforced.
In this post I’ll give a brief breakdown of what skills, equipment, and money you will need to climb Pisco independently in 2023 (and 2024).
First things first — speaking Spanish will be extremely helpful for achieving all of this. It’s not required, but you will probably get worse prices and experience more friction if you only speak English.
Vale. Adelante.
Arriving in Peru
International flights are into Lima, the capital. From Lima, you will need to catch a bus to the town of Huaraz, about eight hours north. The road is generally well-maintained and most buses are comfortable, including with lie-back seats. In 2023 the bus ride from Lima to Huaraz cost $20-$30 one-way, depending on company, dynamic pricing, and comfort level. Luggage above 20kg will incur an extra charge, but this is cheap. I used the company Cruz del Sue and had no complaints. Bring your own food because the bus will not stop.
Lodging in Huaraz
Huaraz is quite touristy, and full of hotels. Private accommodation can be arranged for under $20, while a bed in a shared dormitory can be had for as little as $3. I stayed at Hostel Monkeywasi, a bit pricey for a hostel at $9/night, but a good place to meet climbing partners. More upscale accommodation is also available if you prefer.
Altitude Acclimatization
Most people cannot journey to a height of 5,760 meters without spending some time getting adjusted to high altitude first. If you ascend the mountain directly without proper acclimatization you risk getting severely sick. Common symptoms of altitude sickness include, but are not limited to:
- Headache
- Lack of appetite
- Nausea
- Difficulty sleeping
Persistent headache is the most common and easily-recognizable symptom on this list – keep an eye out for it. The only solution to severe altitude sickness is to descend to a lower elevation.
In order to avoid falling ill, it is advised to spend a minimum of three nights in Huaraz before heading up to the mountains. Doing a day-hike to a higher elevation such as Churup or Laguna 69 (both cerca 4,600m), and then returning to sleep at a lower elevation, is also beneficial.
Climbing Pisco Unguided

Pisco is a mountain in the Cordillera Blanca with a height of 5,760 meters. To climb the mountain you will need your own mountaineering equipment, including mountaineering boots, a tent, and a properly warm sleeping bag (0F/-20C). All of the equipment you need can be rented in Huaraz, but if you are considering climbing this mountain on your own, I hope you already have lots of this stuff.
Gear List for Pisco:
- Climbing partner (minimum 1, preferably 2 or 3)
- Climbing rope (single)
- Piolet/ice axe
- Snow pickets/snow stakes (1 for each member of party)
- Ice screws (optional/conditions dependent)
- Crampons
- Mountaineering boots
- Approach shoes
- Down jacket
- Softshell pants
- Sunshirt
- Glacier Glasses
- Sunscreen (high SPF)
- Thermal underwear
- Warm gloves
- Climbing Helmet
- Headlamp
- Sleeping Bag
- Sleeping Pad
- Tent
- 60-80 liter backpack
- Crevasse Rescue Kit
- Belay/Rappel Device
- Backpacking Stove
- Food
- GPS Device (optional, but highly useful in case of low visibility)
That should cover the basics, although you may want to bring extra layers for hiking in and providing extra warmth. In the end your safety depends on your decisions.
How to Get to Pisco Base Camp Via Public Transport

Getting from Huaraz to Pisco Base Camp is pretty easy, owing to the popular Laguna 69 day hike which begins from the same trailhead. From Huaraz, you have three options to arrive:
- Tourist bus: you can join a tour headed to Laguna 69, of which there are many departing daily. Inquire at tourist agencies in Huaraz to see what the current prices are. This option is convenient and comfortable, and can be surprisingly competitive on price.
- Private Taxi: a taxi can be arranged in advance or flagged down off the street to take you to the trailhead – although I strongly advise arranging one in advance, both to be sure on the price and to ensure the driver knows where he’s going. The price for a private taxi from Huaraz will be somewhere around 200 soles one-way, depending on your negotiating skills.
- Collectivo: The ubiquitous South American minibuses will get you to base camp cheaply. From Huaraz, ask a taxi driver to take you to where the collectivos leave for Yungay (or ask a local and walk with your heavy pack, if you’re feeling sadomasochistic). The collectivo from Huaraz to Yungay currently costs 8 soles per person ($2.25), and takes about an hour. Once in Yungay, which is a decent-sized city, get off at the “paradero”, where you will be approached by more taxi drivers and collectivos looking to take you up the hill. Ensure they understand you want to go to “Cebollapampa”, “Pisco”, or “Laguna 69” (all three names will get you to the proper place). A private taxi will cost around 100 soles (~$30) (after some bargaining to bring the price down), while a collectivo from Yungay to Laguna 69 should cost about 25 soles per person (~$7). Keep in mind that you may be asked to pay a fare for your bag, if it cannot go in the trunk or on the roof of the collectivo.
I should also note that you will be required to purchase a Huascaran National Park Pass – ($9/day or $41 for a month for foreigners). The taxi or bus will stop at a control point for this.

When you return from Pisco, you can reverse this route. If you hope to catch transit down from the trailhead (Cebollapampa), it is best to try and arrive there early in the morning, so you can take advantage of taxis and collectivos dropping people off to do the Laguna 69 day-hike. After 11 o’clock or so, no more transit will arrive that far up the valley, and you’ll be forced to walk an extra kilometer downhill to the Llanganuco lakes, where plenty of transit will be available for people sightseeing at the lakes. If you miss the morning window, you can also try to catch the buses picking hikers up after they finish the Laguna 69 trail, usually around 3 p.m.-5 p.m. After six o’clock, when night falls, it will be extremely difficult to catch transit, and you would be better served by camping an additional night at Cebollapampa and leaving the next morning.
If returning via collectivo, I highly suggest a cheap local lunch in Yungay, where a menu del dia can be had on the corner next to the paradero for only 7 soles ($2).
Hiking to Pisco Base Camp

Assuming you’ve arrived mostly unscathed, the hike to Pisco Base Camp is pretty simple. You begin down the same path as for Laguna 69, but within only a few hundred meters of trail, you will take a left fork, and follow a sign to Campo Base Pisco. The trail is well-marked well-traveled, and hard to miss. It should take 2-3 hours of hiking with a loaded pack to reach the Refugio Peru in the meadow below the peak.
Pisco Refuge

The Refugio Peru is located at roughly 4,680 meters above sea level (15,350 ft). The refuge is a stone hut with heating, drinkable water, dormitory beds available for hire, and food/drink service. Reservations can be made online if you prefer, although in my experience this year (2023), they did not seem to be mandatory. This has been a low tourist year though, so if your plan hinges on having a bed at the hut, by all means, reserve it in advance.
All the huts in the Cordillera Blanca are run by the Italians, so expect to run into some Italian volunteers as well as local Peruvian staff. English has been spoken to some level at all of the huts I’ve visited in the Blanca.
Prices in the refuge
Currently, a bed in the Pisco refuge costs 50 soles/night ($14 USD). You will be expected to have your own sleeping bag.
Bed and breakfast: 100 soles ($28)
Bed, breakfast and dinner: 150 soles ($41)
Food and drinks can also be ordered a la carte, including Italian dishes like pizza and pasta, Peruvian food like Salchipapa or caldo de Gallina, as well as coca tea, coffee, and liquor. Things like chocolate and Gatorade may or may not be available. You can fill your water bottles up for free; the water in the hut is clean, safe and drinkable.
Camping at Pisco Base Camp

You do not have to be staying at the refuge to take advantage of the services – camping is allowed for free in the meadow below the rock outcropping. Pitch your tent where you like – but be aware that animals including cows, llamas, and donkeys graze in the area, and may try to steal your food if you are not careful. These animals are usually attended by a vaquero or arriero, but not always. And even if they are, the man’s level of concern for your stuff may not match your own.

Although older resources on the Cordillera Blanca mention theft as a major concern at base camps, I have not encountered this. We never employed a camp guardian or took any serious measures to protect our gear, and never had a problem. I have heard of one tent being stolen in the Cordillera this season but the person paraglided off the summit and waited two weeks before even attempting to return and reclaim their tent. So, YMMV.
Pisco Moraine Camp

From Pisco Base Camp, you have two options for climbing the mountain:
- Attack from Base Camp, ascending 1,100m in a single day. This is certainly doable if you are fit and familiar with the terrain. It will require an extremely early start however (likely before midnight).
- Advance to the base of the glacier, and set up at Moraine Camp, 4,950m. The main advantage to using the moraine camp is that you don’t have to stumble across the huge glacial moraine in the dark, which seems like it would be difficult route-finding and very little fun, overall. The downside is that you have to carry your full camping kit a little further, and a little higher. We used the moraine camp.

There are several options for Moraine Camp. The first would be to set up on the shores of Laguna Matacocha (one spot). This would be an incredibly scenic campsite, if you have time to enjoy it. If that spot is occupied or you wish to continue ascending, follow the trail uphill (~50 meters of vertical gain or so) to a mostly dried-out lakebed, with spots for 2-3 tents. This is the highest moraine camp you can establish, and has the benefit of being extremely close to running water. In between these two spots you will also see plenty of flat, established campsites. These intermediate spots would be ideal for large groups, but lack easy access to water.
Climbing Pisco

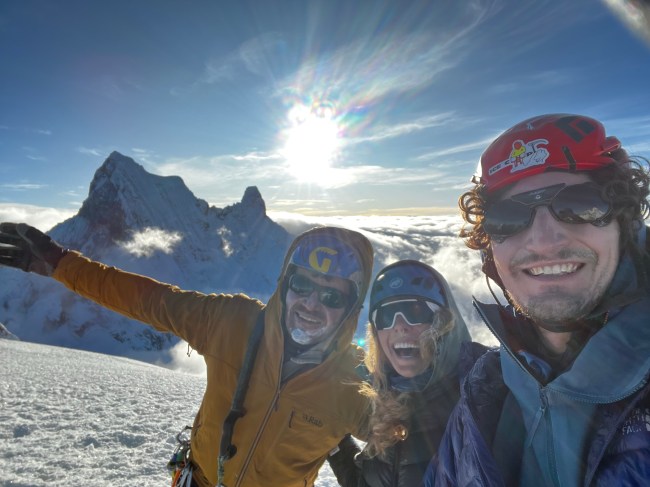
From moraine camp all that remains is to gain the glacier avoid the crevasses, and gain the summit. We left moraine camp around 2:30 a.m. and were the first party on the summit, a little before 7 a.m. I suspect this is a pretty average pace.
The path will vary from year-to-year due to the crevasses, but in general this mountain should be simple, without many steep sections. It is always a good idea to inquire about current conditions on the glacier in Huaraz before leaving and at the refugio in order to get the most current beta.

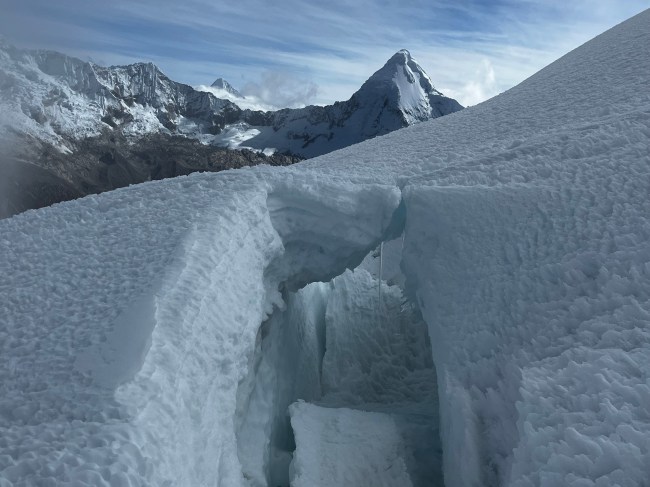
Unless there has been recent precipitation or heavy winds, there should be a bootpack to follow. This should generally be safe, although you must use your common sense and not assume the path is free of hazard. For instance, when we climbed Pisco the bootpack crossed this snowbridge. It held for us when we crossed it in the night but when we descended during daylight, we opted to walk around.
If a rappel is required, local guides will have installed a permanent picket (called an estaca in Spanish). You can use this instead of burning one of your own – although be aware, the local ethic is to rappel straight off of cord, with no metal link. If this gives you the heebie-jeebies, feel free to install your own quicklink or carabiner.
The main hazards of climbing Pisco are cold, crevasses, altitude sickness and fatigue. Cold, fatigue and altitude sickness can all be mitigated by staying hydrated. Drink tons of water during the day, even if you don’t want to. For nighttime and during the early hours of the climb hot tea in a thermos is an essential.
The Final Word on Climbing Pisco Unguided
Mountaineering and especially high-altitude mountaineering like this is a test of will. The route is not complicated, and few special skills beyond basic glacier travel are required. However, the totality of the undertaking is large, when you factor in the journey from Huaraz, the long hike with all your camping gear on your back, the altitude, the cold. A guide can be useful in keeping your spirits up, and encouraging you to keep going. When climbing unguided, you will have to face your own doubts and your own demons, as well as take full responsibility for all the safety decisions you make during the climb. It is doable, but it is also not a “hike”.
For those with the experience and constitution, climbing Pisco unguided can be a fulfilling and enlightening experience.
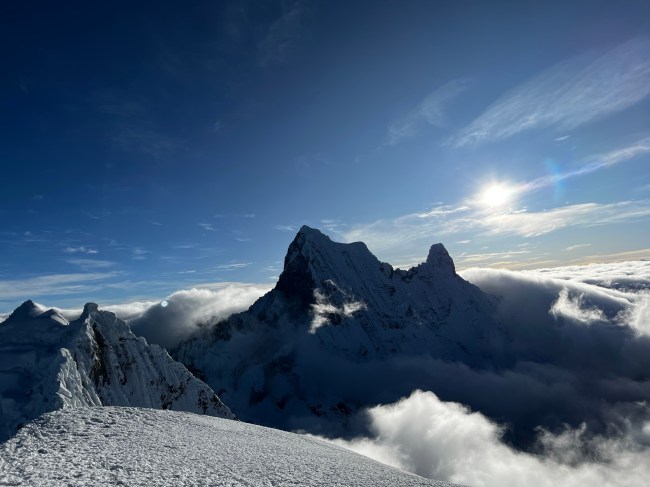
And the views are unbeatable.
Disfruta!

This one is on my bucket list. Thank you for the tips and inspiration!
You can do it!!